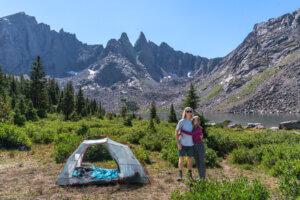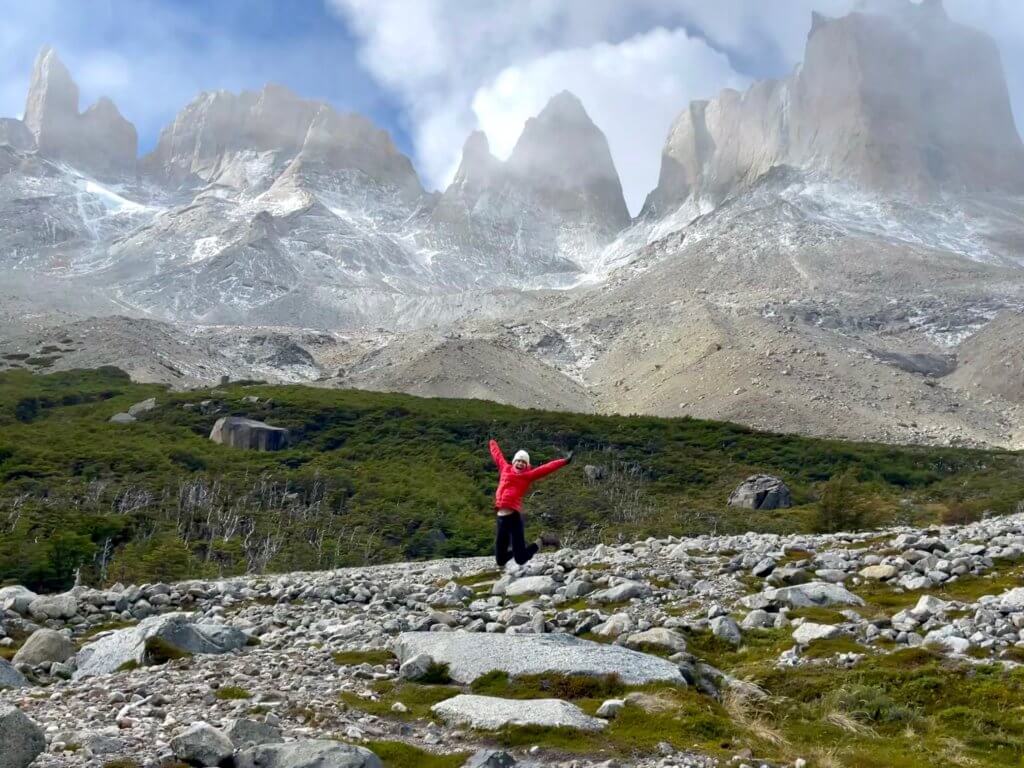
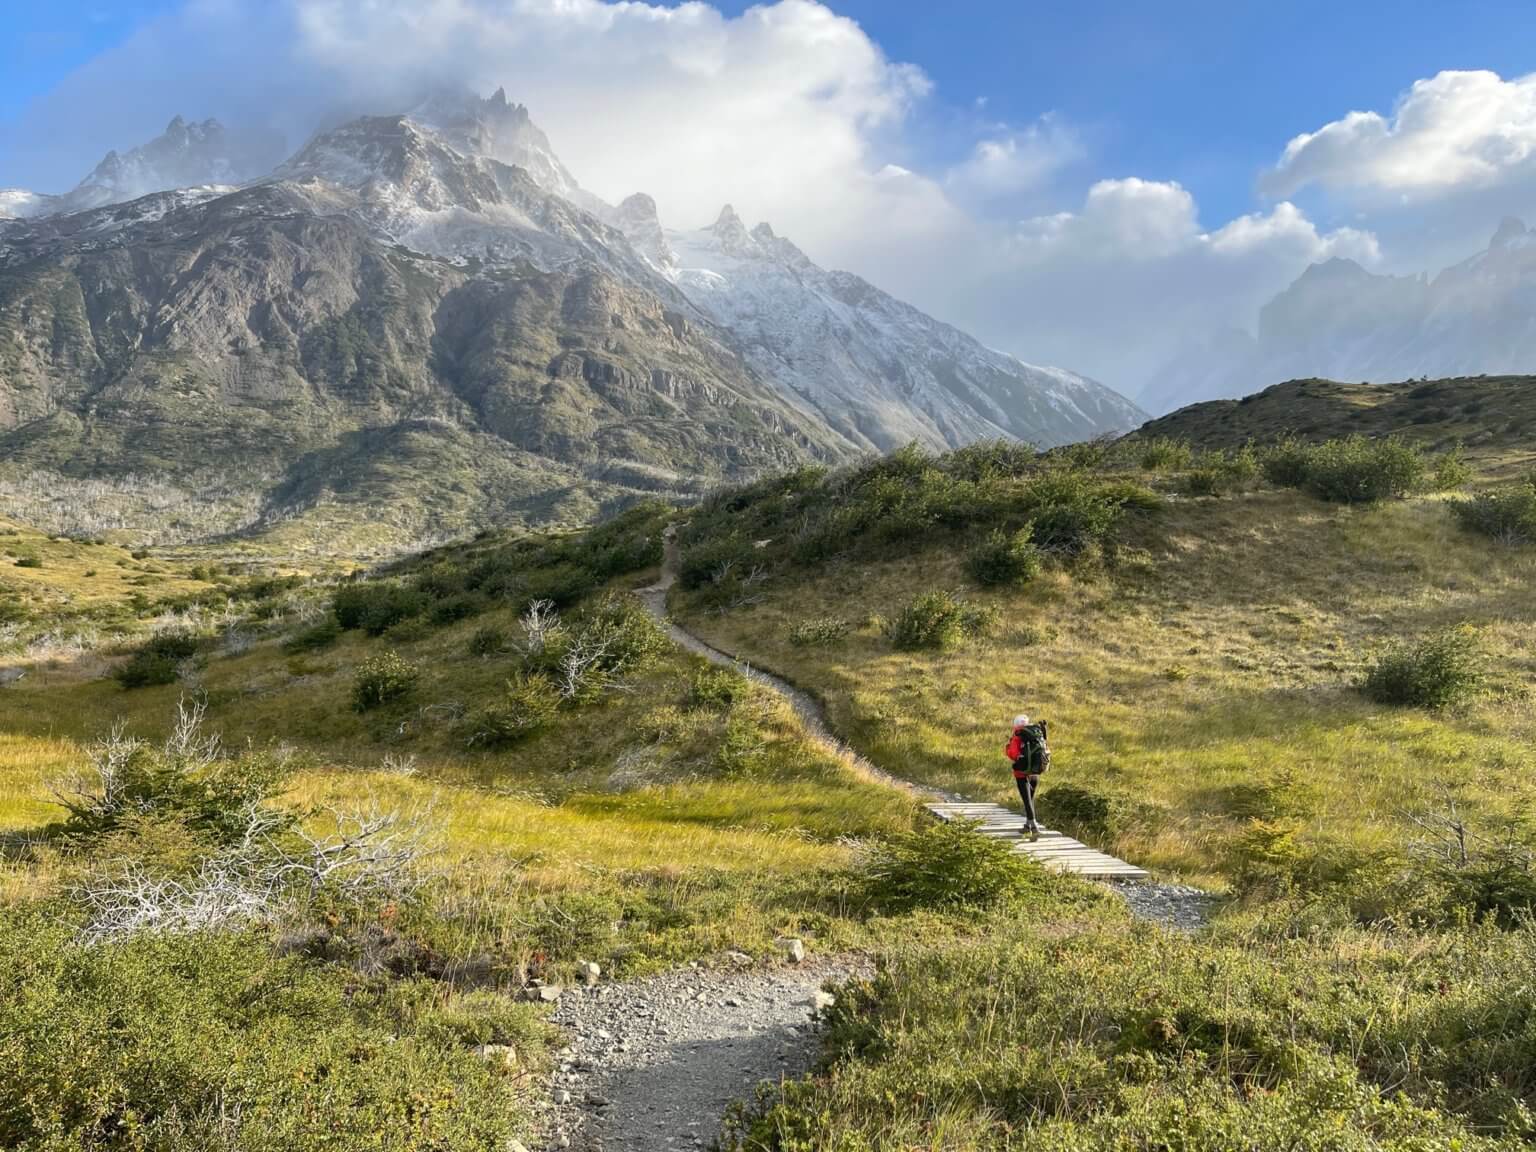
Torres del Paine National Park is the heart and soul of Chilean Patagonia. It is home to the 3 famous towering peaks of the Paine Mountain range as well as multiple glaciers, lakes and gorgeous landscapes! The W in Torres del Paine is the most famous backpacking route in the area, highlighting a lot of what the park has to offer. It is equal parts challenging and rewarding and is the adventure of a lifetime! Hiking the W requires a lot of planning and coordinating, which can be quite overwhelming. Below, I have detailed everything you need to know to get ready for your W trek!
Check out our backpacking gear guide for gear recs.
| ***Disclosure: This post contains affiliate links. If you click one of them, I may receive a small commission (for which I am very grateful for) at no extra cost to you. |
Contents
What is Torres del Paine’s W Circuit
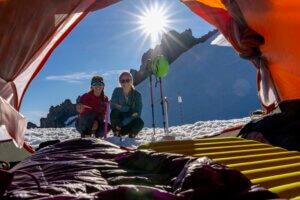
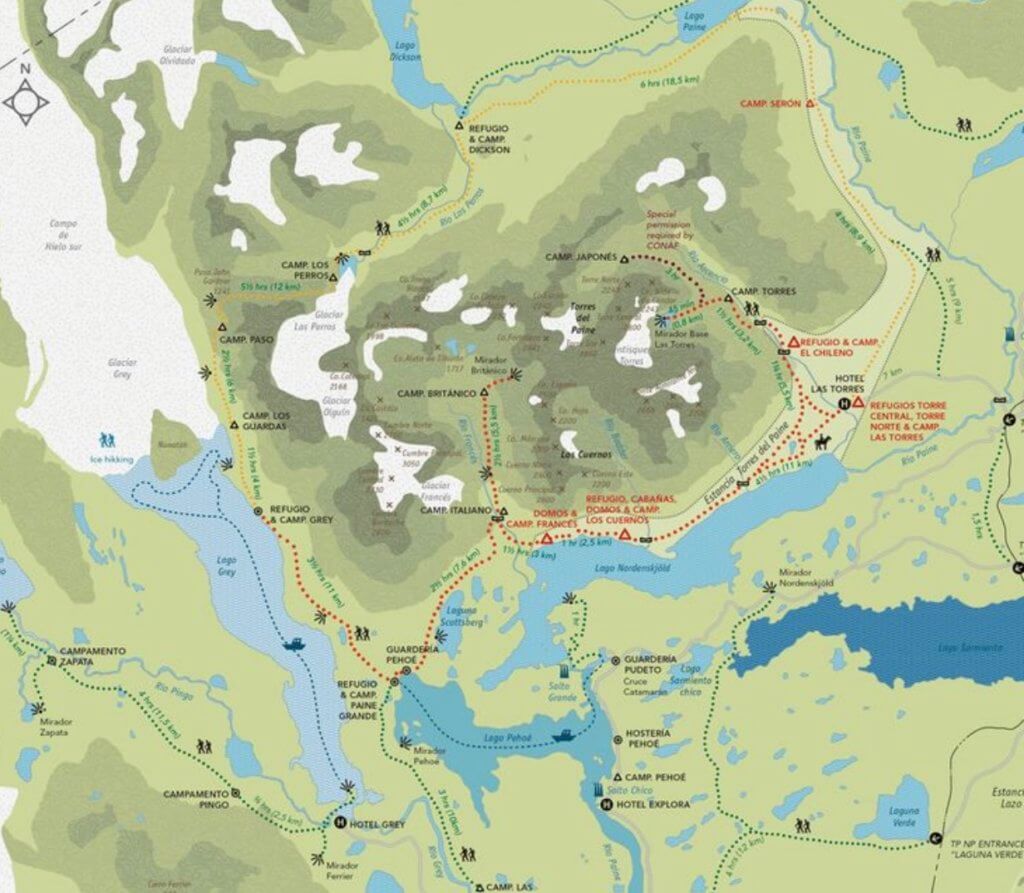
The W is a multi-day backpacking adventure. The trek is a 40-mile ONE WAY route that can be done either clockwise or counterclockwise. The W route is PART of the park’s full O route and is usually completed in 4-5 days. There are established campgrounds throughout the trek that include showers, a dining room, and other amenities. Whether you are a seasoned backpacker, or this is your first time getting into the “backcountry”, you can successfully complete the W, if you come prepared!
***If you are an avid backpacker/in good hiking shape and have the time, then I would highly recommend the doing the full O (which includes the W section)!
When to Hike the W
Summer season is the opposite in Patagonia, due to it being in the Southern hemisphere, therefore “high” season is considered November-March, with December-February being the most popular time for trekking. In these summer months, the highs can be anywhere around 70 F (20 C) and lows down to 40 F (5 C).
Do You Need a Guide to Hike the W
The quick answer here is NO, you do not need a guide to hike the W. The route is very well marked, and route finding is not an issue. Plus, I am going to provide you with all the information you need to book the entire trip on your own!
BUT, if you are a beginner backpacker, or solo traveler you might want to book a guide or group to go with. There are definitely some perks to a guided hike, such as NOT having to plan and book campsites/transportation, having your tent already pitched, with a sleeping pad and sleeping bag ready for you at each campground every night, FULL board- with every meal cooked and provided to you on spot (you will have to carry your boxed lunch each day), and finally having the luxury of not having to carry the extra weight of food and sleep supplies in your pack.
I would highly recommend going with WHOA Travel if you’re interested in a guided trek! It is a women owned/women run, all-women’s travel company and it is SO much fun! I (Isabel) personally lead some of the group trips, if you want more info please reach out! Otherwise, Venture Patagonia is a great company to use as well!
If you’re looking to go unguided KEEP READING!
How to Book Campsites in Torres del Paine/What to Book
You need to make reservations IN ADVANCE to hike the W route! A good rule of thumb is to book the sites at least 3 months before your planned trip. These campsites fill up FAST, so I would suggest waiting to book any flights/hotels/transportation until you SECURE your campsites.
How to Book Campsites in Torres del Paine
Let’s first dive into HOW to book camping. Bear with me, as this (to me) was the most confusing part of planning the trip. There are three different companies that own the campsites in Torres del Paine, known as CONAF, Vertice Patagonia, and Las Torres (Fantastico Sur). CONAF offers free campsites, but as of spring 2022 they are UNDER CONSTRUCTION. They are not available to book. Vertice Patagonia owns campsites Grey, and Paine Grande. Las Torres (Fantastico Sur) owns campsites Central, Frances, and Los Cuernos. The Vertice and Las Torres campsites can be booked on each of their websites listed below-
What to Book for Torres del Paine
Now let’s talk about WHAT to book! Below is the suggested 8 day/7 night booking itinerary. This is a quick reference to use when booking your sites, but for more detail see section “daily breakdown”.
1: Central
2: Frances
3: Paine Grande
4: Grey
Before you make your reservation there are a few KEY decisions you need to think about regarding room and board. The cheapest option you have would be to bring all your own food and gear and only book the campsite itself. If you’ve got a little extra cash then you can choose the option to rent gear and/or buy the food packages at each site.
Rental Gear
All of the campsites offer the option to rent a tent, sleeping bag, and sleeping pad. When you rent this gear, it will already be set up for you when you arrive to camp.
Check out our backpacking gear guide for gear recs.
Food
Each campsite also offers breakfast, boxed lunch, and/or dinner. The breakfast and dinners are all restaurant style. You sit at a table and are served a 3-course hot meal. For each meal you will get the choice of regular or vegetarian. Other than that, you get whatever they are serving for the night. The boxed lunches normally consist of a hearty sandwich, a fruit, and a couple of snacks such as energy bar or trail mix.
Rental Gear/Food Price Breakdown
Vertice Campsites
- Tent Site: $9
- Tent Rental: $29
- Sleeping Bag Rental: $22
- Sleeping Mat Rental: $7
- Breakfast: $16
- Lunch: $17
- Dinner: $29
Las Torres Campsites
- Tent Site: $21
- Tent Rental: $39
- Sleeping Bag & Mat Rental: $30
- Breakfast: $21
- Lunch: $26
- Dinner: $39
*** All items expressed in USD
You will also have to pay the National Park entrance fee, in addition to booking each campsite. This can be done in advance here.
How to get to Torres Del Paine National Park
The best way to get to Torres del Paine is by bus from Puerto Natales. From Puerto Natales you will take the bus that ends at Laguna Amarga (Base Torres) ~ $9 USD one way. Book your bus ticket here.
Once you get to Laguna Amarga, you will take a quick 5 min shuttle to Camp Central. This is cash only and around $5 USD or 4,000 CLP.
Daily Breakdown
***The mileage and elevation shown is what we ACTUALLY did, not an average of what is online. We used precise Garmin watches to gather our data.
Day 1: Puerto Natales – Camp Central
12.9 miles, 4127 ft elevation
You’ll want to catch the earliest bus departing at 0645 am to get to Torres del Paine. You should arrive at the park around 9 am and will immediately start your hike up to the Towers! It is a long first day, but an iconic one to say the least! You will be pitching (or renting) your tent at camp Central tonight.
Day 2: Camp Central – Camp Frances
10.1 miles
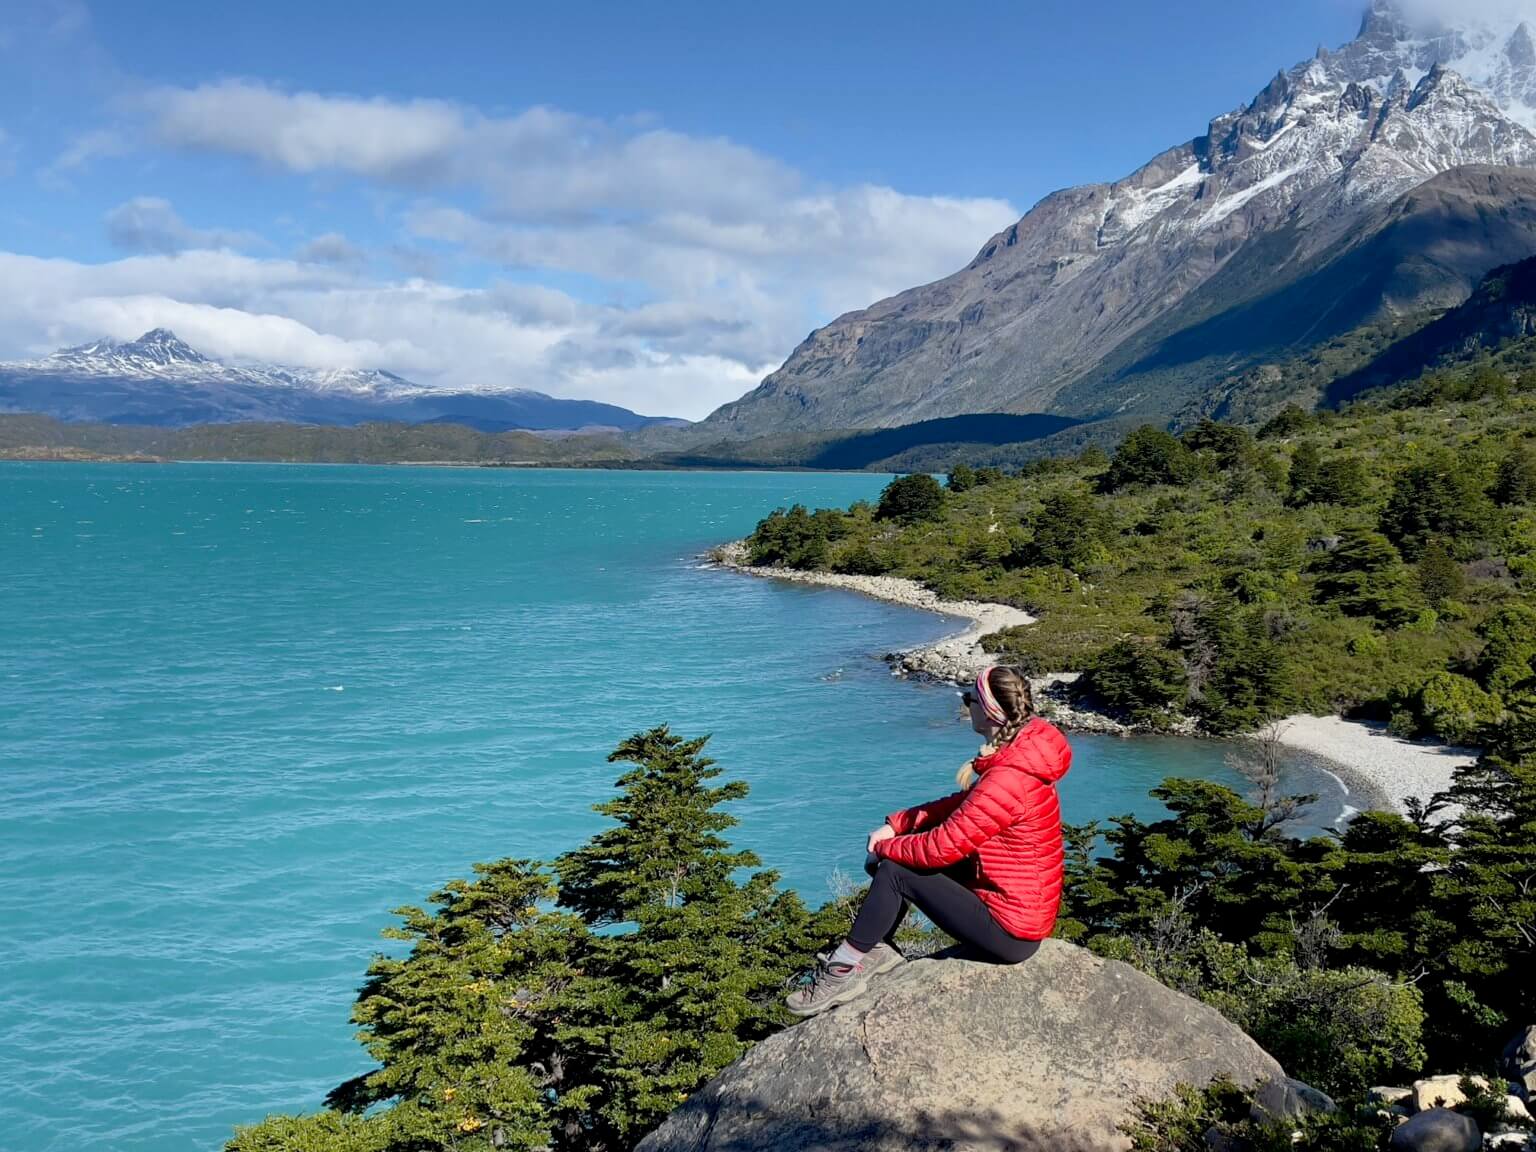
Today, you will hike alongside Lake Nordenskjold towards the French Valley sector of the park. The perfect turquoise water will keep you company as you navigate the various landscapes and enjoy being “off-grid” for a bit. Keep your eyes peeled, as the park is home to various condors that soar around the Patagonian skies! We were able to spot at least one per day! So cool!
Day 3: Camp Frances – Camp Paine Grande
12.8 miles, 3543 ft elevation gain
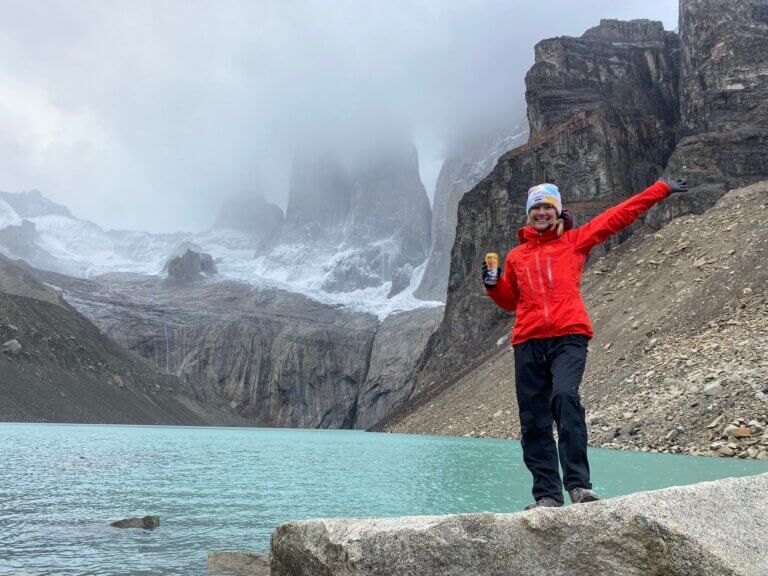
You will start the day by heading towards Camp Italiano (under construction). At the camp, you can drop your pack off at the old refugio, as the rest of the hike will be out and back. You should feel light as a feather without your bag on, so use it to your advantage to make sure you have enough time to make it all the way to Britanica (the lookout point)! The view is well worth it. Once at Britanica, you will head back to Camp Italiano, grab your pack and continue onward to Camp Paine Grande for the evening.
Day 4: Camp Paine Grande – Camp Grey/ Ice Kayaking
6.7 miles
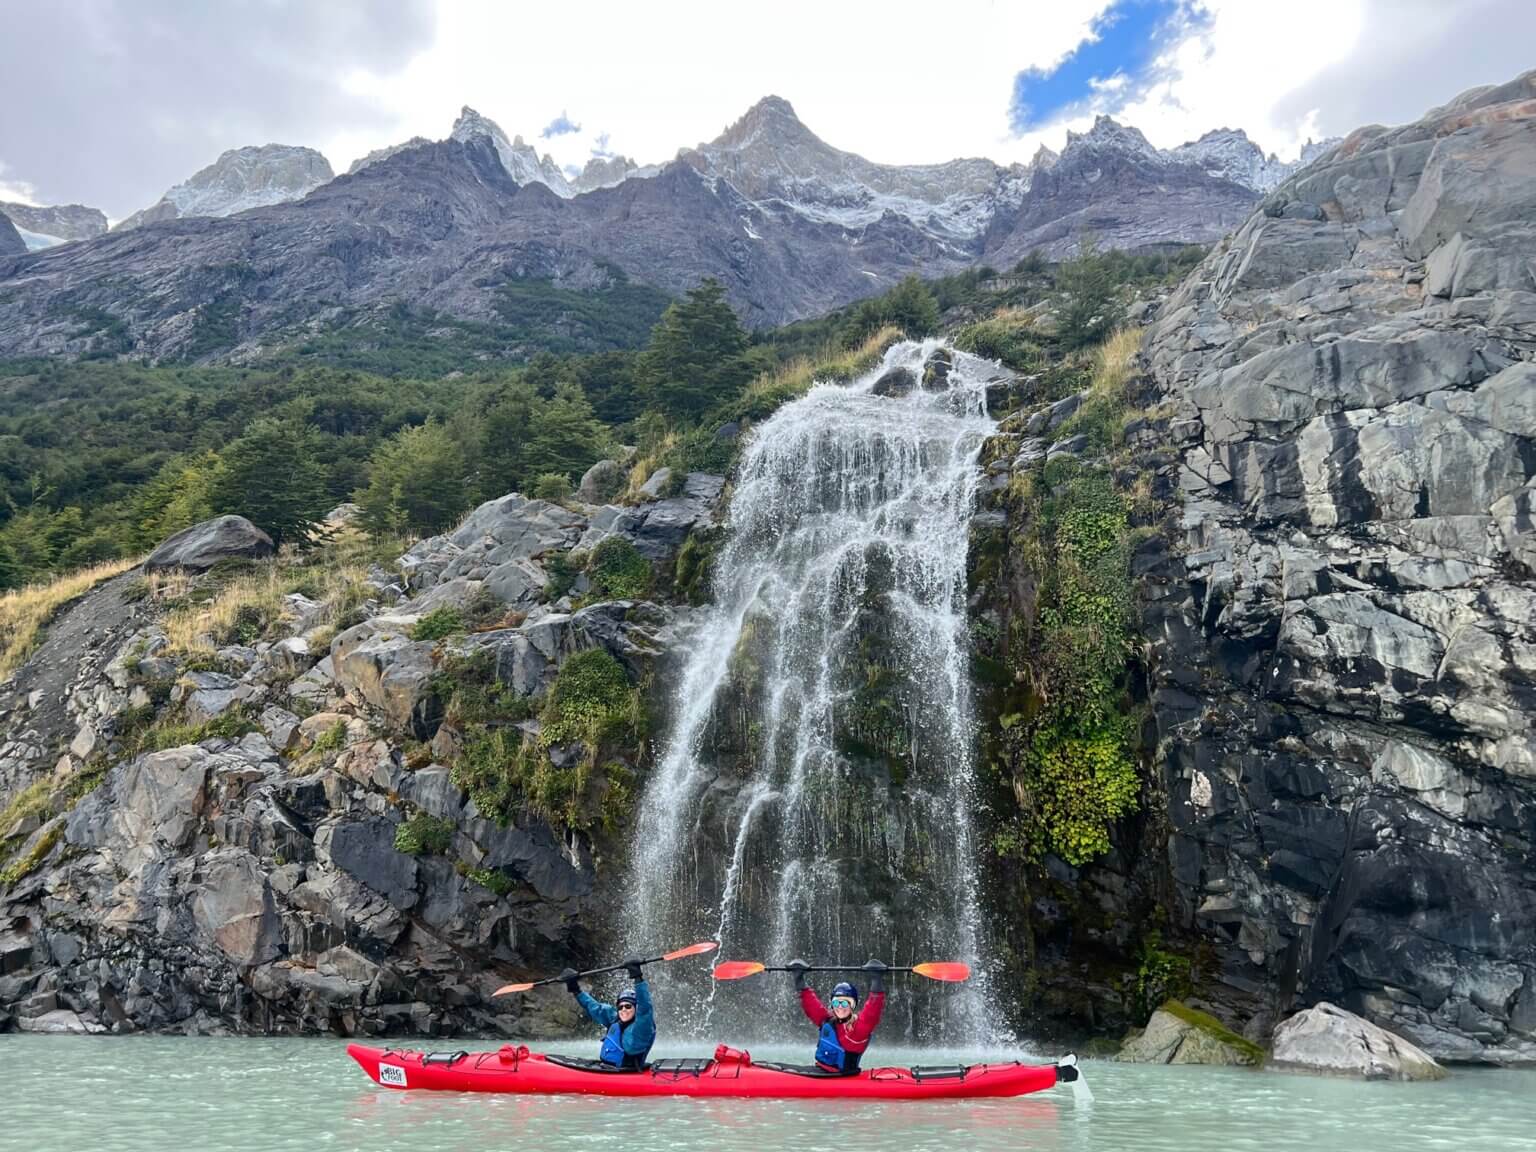
The last day of your trek! Today is a shorter and easier day, leaving you plenty of time to set up camp and then go ICE KAYAKING around glacier grey! It is such a cool experience to get up close and personal to the numerous icebergs floating around the glacier. You will want to book this in advance with Big Foot Patagonia. They will set you up with wetsuits/helmets/kayaks/drybags and everything you need! The launch site is right at camp Grey, just a 5-minute hike down to the water.
Day 5: Camp Grey – Puerto Natales
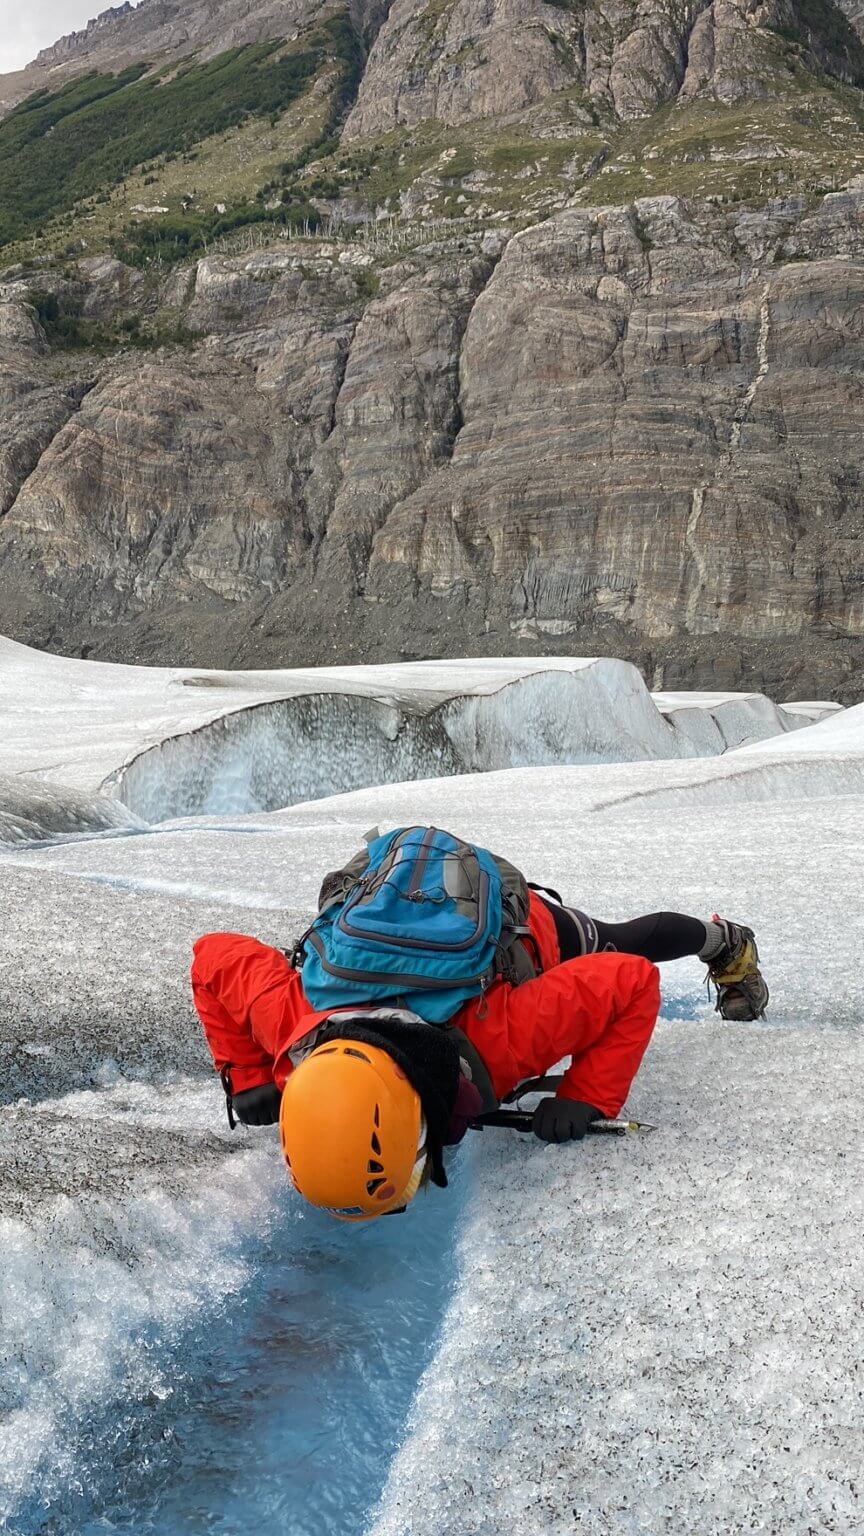
Today, you will sadly be heading back to Puerto Natales; BUT FIRST you have the option to strap on some crampons and hike out onto Glacier Grey! It is such a unique experience to stand on this massive glacier that is a part of the Southern Patagonian Ice Field! I would highly recommend this tour! It is expensive, but a once in a life-time experience.
Big Foot Patagonia is the go-to company for this adventure as well. You’ll launch from the same place you did for kayaking, a 5-minute walk from the campground.
After your morning on the ice, you will catch the catamaran boat that departs at 2 pm. It’s a 1-hour boat ride, that includes a celebratory pisco sour! Once you doc, you will have a 3 km walk along Grey Beach to get to the bus station. This bus station is called Terminal Pudeto. Take the 630 pm bus back to Puerto Natales.
Gear Guide for Torres del Paine
You will want to pack THE USUAL backpacking gear when going on your trip, but there are a few items specific for Patagonia that I want to go over that might not make your normal packing list..
Guylines and heavy-duty stakes: They are a MUST HAVE item for your tent! The winds in Patagonia are no joke, our friend’s tent broke on night one because she didn’t stake the guylines down. Even if the day has been a calm one, STAKE IT DOWN!
Wind Layers: We normally like to bring our lightweight, packable rain/wind layers when backpacking, but for this trip we opted for our heavy duty Gore-Tex layers to help break the wind, and we’re glad we had them.
Chapstick: Another wind related item (are you seeing a trend here), never forget chapstick!
Hiking Boots: We suggest using boots versus trail runners! The terrain is very rocky, and some extra ankle protection is nice to have. We LOVE these Salomon’s in women’s and men’s!
Sleeping Bag: Make sure to have a bag rated for 30 deg F or lower.
TREKKING POLES: Save your knees people, you’ve got a lot of elevation to go up AND down.
Nalgene: We did not carry a water bladder at all! We each had our 1L Nalgene that we refilled when needed in a river/stream.
Pack LINER: You will want a pack COVER too, but a lot of times when the winds are howling, the pack covers will fly into the air and give zero protection from the rain. By having a pack liner, you will ensure that your gear/clothes stay nice and dry
Helpful Tips for visiting Torres del Paine
- The trail is VERY well marked. You do not need a map, but it is always best practice to carry one.
- There is an option to pay for Wi-Fi at each Refugio.
- Fires are NOT ALLOWED, and camp stoves are only to be used in designated areas at the refugios (they will show you at check in).
- Almost all of the refugio’s have hot showers. You should bring a packable towel and toiletries if you plan on showering.
- You do not need a water filter! There is plenty of safe running fresh water from rivers and streams along the trail.
- Bring a book or deck of cards. Sometimes you will get to camp early and it’s nice to have something to occupy your mind while your body rests.
- You should get the Calafate beer AT LEAST ONCE. It is made from the Calafate berry and it is absolutely delicious. They sell it at each refugio.
Happy Backpacking!