Mt. Emerson (13,210′) is a beautiful mountain located just outside the town of Bishop, CA. It’s easy access and low technicality make this route an excellent choice for aspiring alpine climbers to get their feet wet. With that being said, this is not a route to take lightly. It’s a big physical undertaking and the route finding isn’t obvious.
Check out Climbing Half Dome with the Cables Down, and if that intimidates you then I would re-think climbing Mt. Emerson. Approach this adventure with caution and be honest with yourself about your capabilities.
Proceed with Caution
There have been a significant number of rescue calls on Mt. Emerson. In my opinion this is due to some people downplaying the overall difficulty of the route.
It is often suggested that most climbers solo the route and I believe that makes a lot of people think they should do the same. There is only a short 5.4 crux at the beginning of the route, however, a stumble or fall at most places on this route would result in an injury, and in other sections- death. The ridge line is very exposed and this can play with your head. Therefore, I highly recommend taking a rack and a rope. At minimum take enough gear to bail in the event of bad weather.
Case in point:
On the day we climbed a pair of soloists made it to the U notch where the exposed ridge line starts. We were about two pitches beyond the notch when we noticed them. As we summited we were surprised that the pair had not caught us yet (we pitched out most of the ridge). We looked back to the notch but didn’t see anyone so we assumed they were just taking their time.
On our way down from the climb Inyo SAR was on their way up, and after a brief conversation we realized that they were responding to the rescue call of the stranded soloist. They were not able to climb the exposed ridge and weren’t able to down climb the route.
Remember, there’s no shame in roping up on a route that “most climbers solo”. Know your limits, always have a contingency plan, and you’ll have a great time on this classic route!
Contents
| ***Disclosure: This post contains affiliate links. If you click one of them, I may receive a small commission (for which I am very grateful for) at no extra cost to you. |
Best Time to Climb Mt. Emerson
The sweet spot for climbing Mt. Emerson is June-September. If you go too early in the season you’ll likely find a waterfall running down the main gulley. If you go too late there’s a good chance there will be snow on the route.
Who Should Climb Mt. Emerson?
In an alpine climbing context this is an easy route. However, to your average adventurer this climb is a massive undertaking. You should only attempt this route if you’re physically fit and have the technical climbing knowledge to complete the route safely; Which includes being able to retreat off the mountain if necessary.
Gear Recommendation for Mt. Emerson
My recommendations are:
- Singles .3-2 C4s
- Full set of nuts
- Multiple slings
- 60m rope
Is this too much gear, absolutely! But when i’m going to the alpine i’m the type of person who would rather have it and not need it, than need it and not have it. I’m not trying to set any speed records out there.
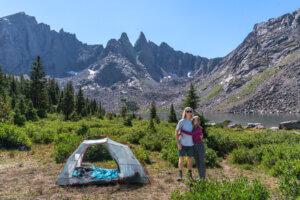
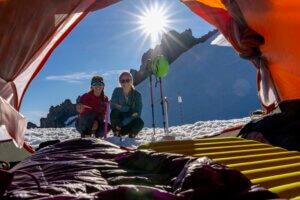
Camping for Mt. Emerson
People often complete this climb in a day, but my preferred method is to hike to Loch Leven and camp the night before. This gives you ample time to scout the route from a distance and the setting is absolutely gorgeous! You will need a backcountry permit to camp here and you can find those here.
Your other option is to camp at the North Lake Campground. This is an 11 site first come first serve campground at the beginning of the Piute Pass trail. It’s $27 a night, but you can get a 50% discount with a National Parks Pass.
If you do camp please remember to apply Leave No Trace principles and be bear aware!
Do not park at the North Lake Campground to start your hike; you’ll likely be ticketed or towed if you do. The closest parking is the hiker lot located about 0.4 miles from the trailhead.
Mt. Emerson Route Beta
Mt. Emerson Approach
You approach the route via the Piute pass trail. It’s roughly 5 miles and 1400′ of elevation gain. If camping at Loch Leven, pick one of the many campsites around the lake.
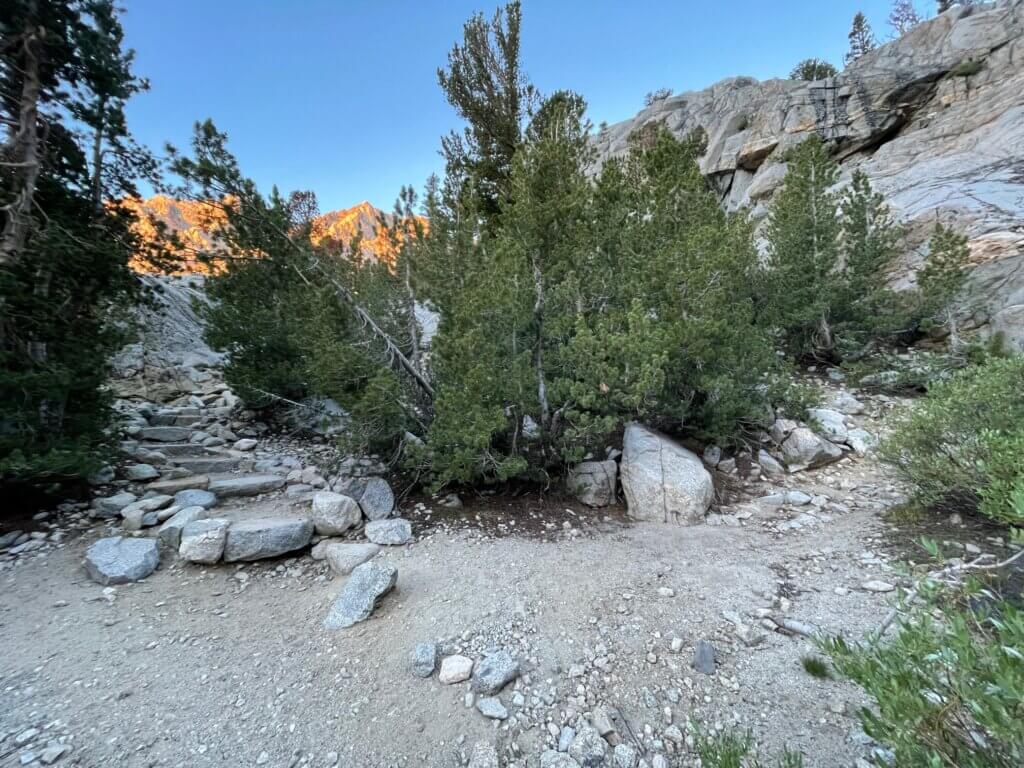
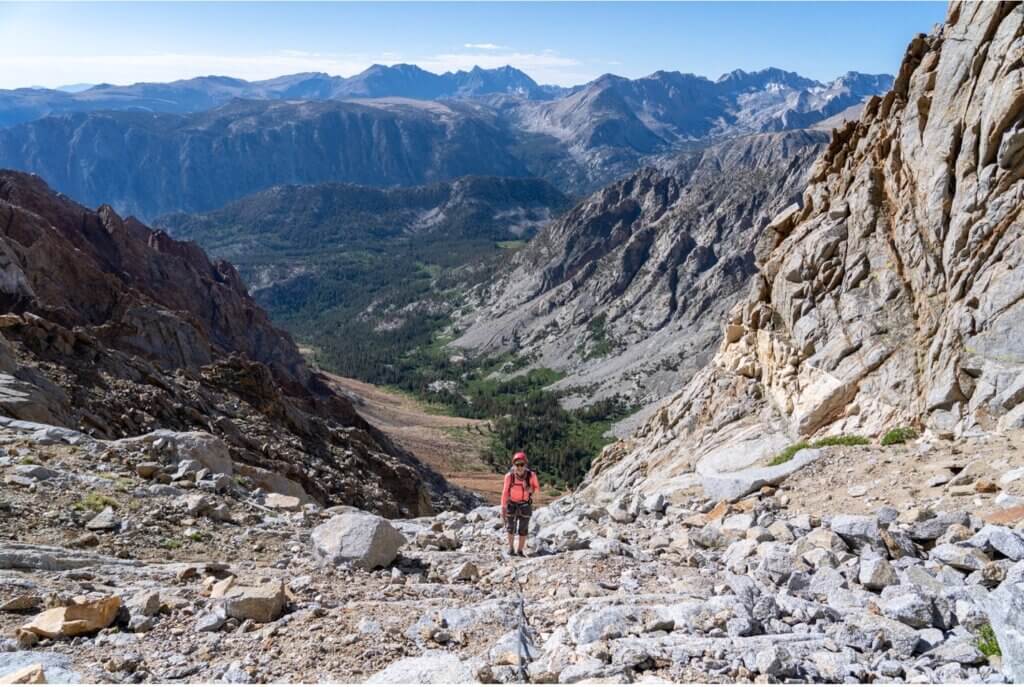
If you’re tackling this route in a day you’ll break away from the trail before reaching Loch Leven. We broke from the trail and turned up the talus field at a boulder before the steps shown below.
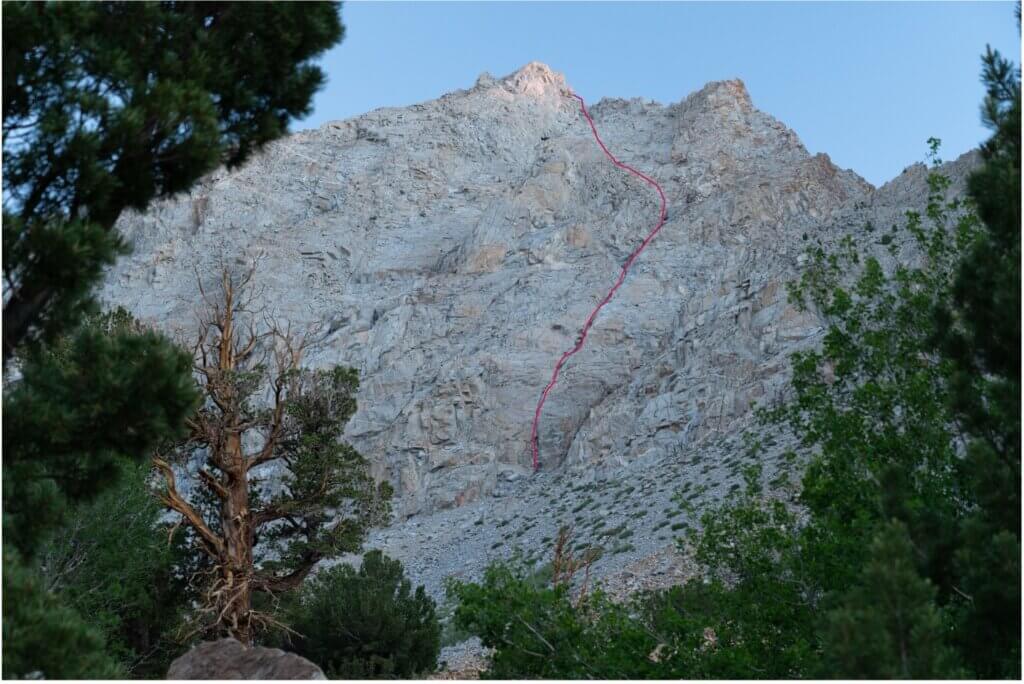
An overview of the route as seen from the approach. Be sure to take some time and study the route from this vantage point because when you’re at the base, and on the mountain, it will look very different. The line stops at the U-Notch; which is where the ridge line starts.
Mt. Emerson Climb
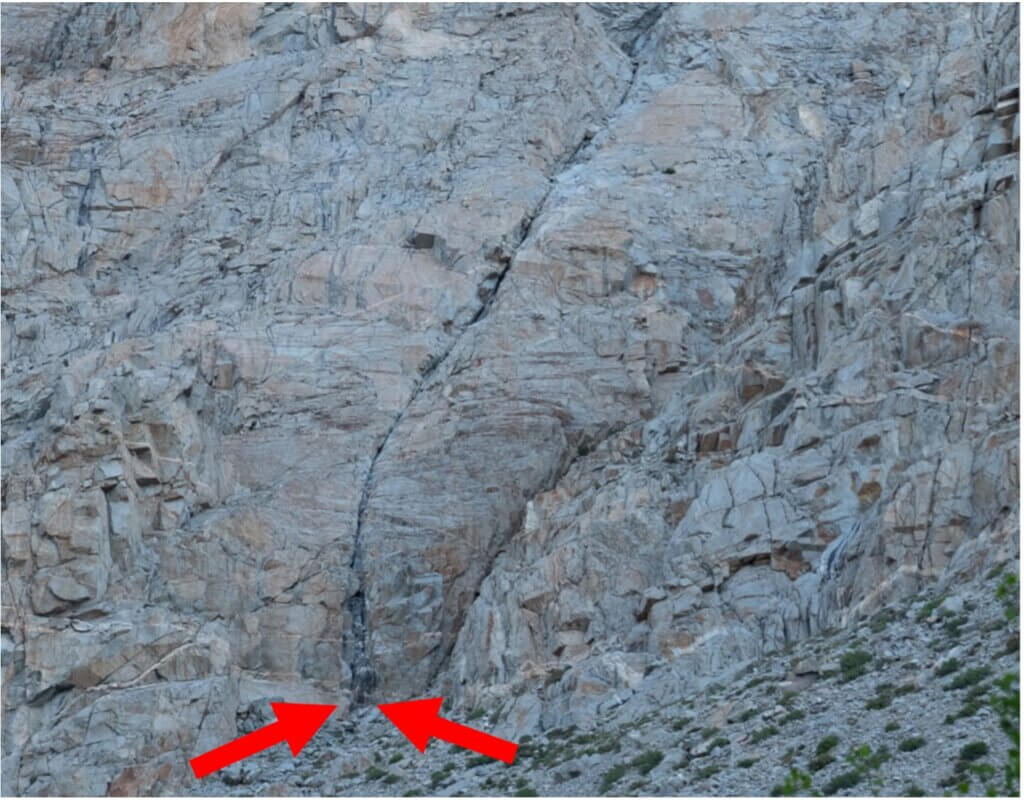
The Crack to the Left
The beginning of the route has two distinct cracks. You’ll want to take the crack to the left. This will be the most technically difficult part of the climbing. If going in the early spring there could be water coming down this crack (Hints the name “Waterfall Route”). If that is the case, there is a 4th to 5th class bypass to the right of the right crack that eventually meets back up with the original route (not shown).
Large Chute
Once you’re through the first 300’ of the black crack, the route will open up into a large chute that you’ll follow for an estimated 800’-1000’. There are many large loose blocks here so be sure to have careful footing. Do your best to not send death blocks down the chute towards anyone below. It’s advised to either unrope or shorten your rope in this section to avoid dislodging a rock.
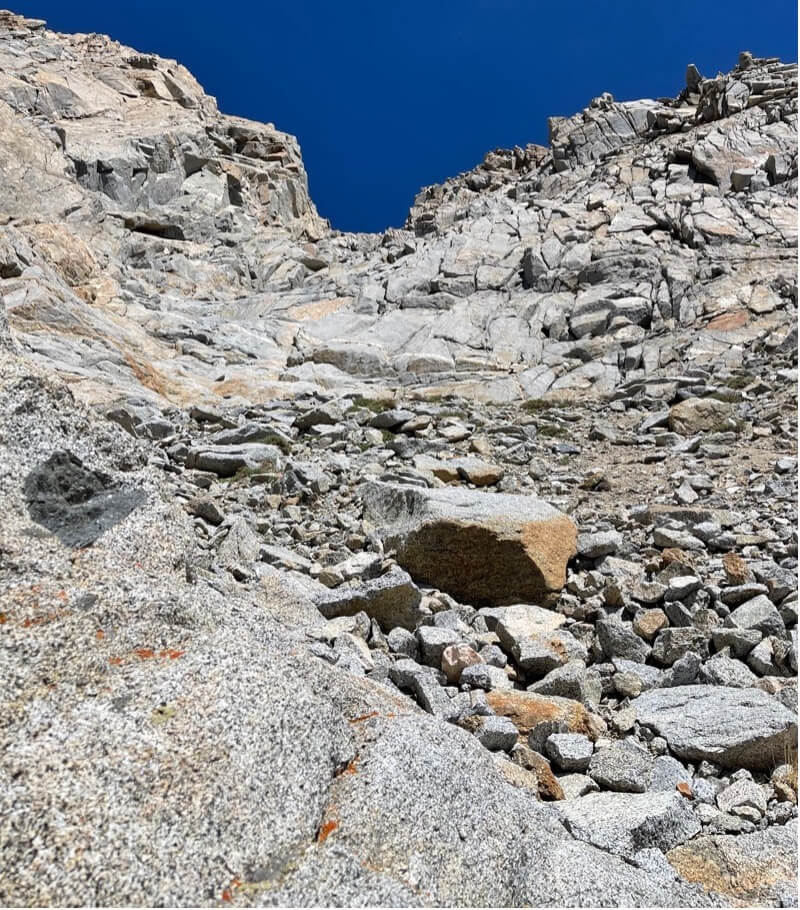
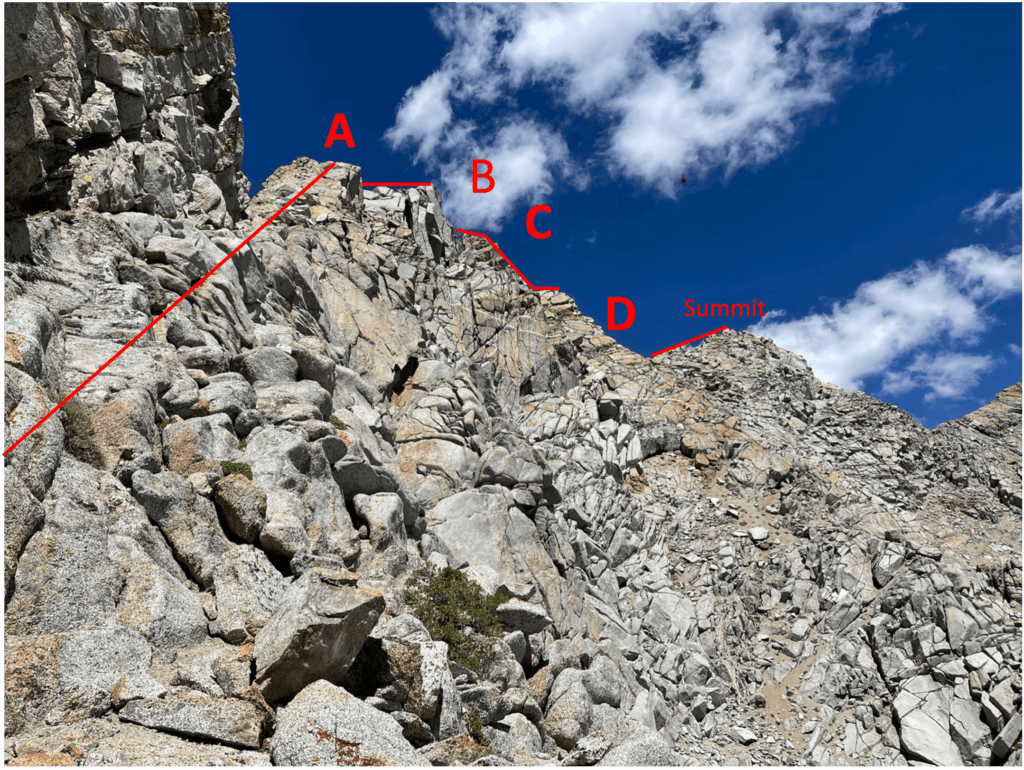
U Notch
At some point the rock will steepen again and you’ll want to make a left towards a small u shaped notch. You can continue straight here if desired, but the climbing will be harder than 5.4. Shown below.
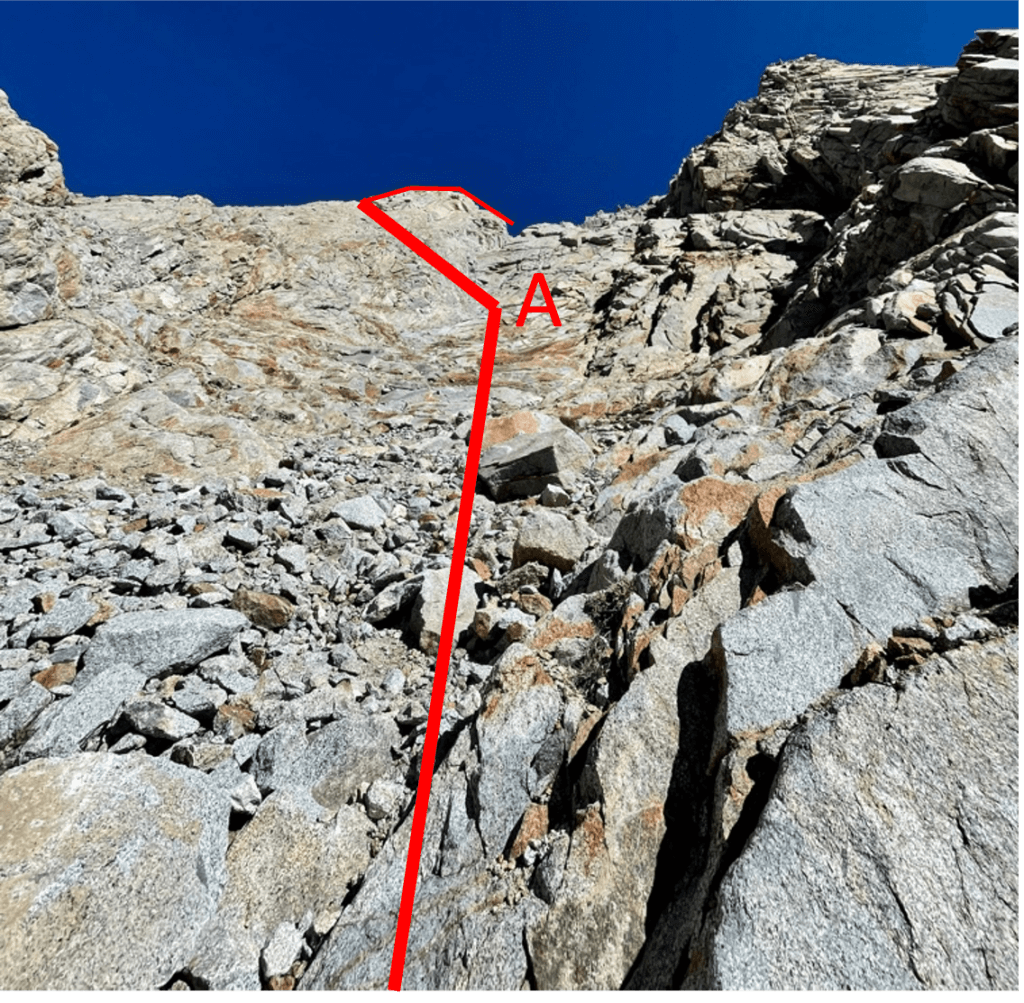
The picture below shows the view from “A”. Once at the small u notch you can either continue straight into another rocky chute and then up; or you can turn right and climb up the 5th class rib that has descent exposure and much better rock quality. We chose the second option and had a blast.
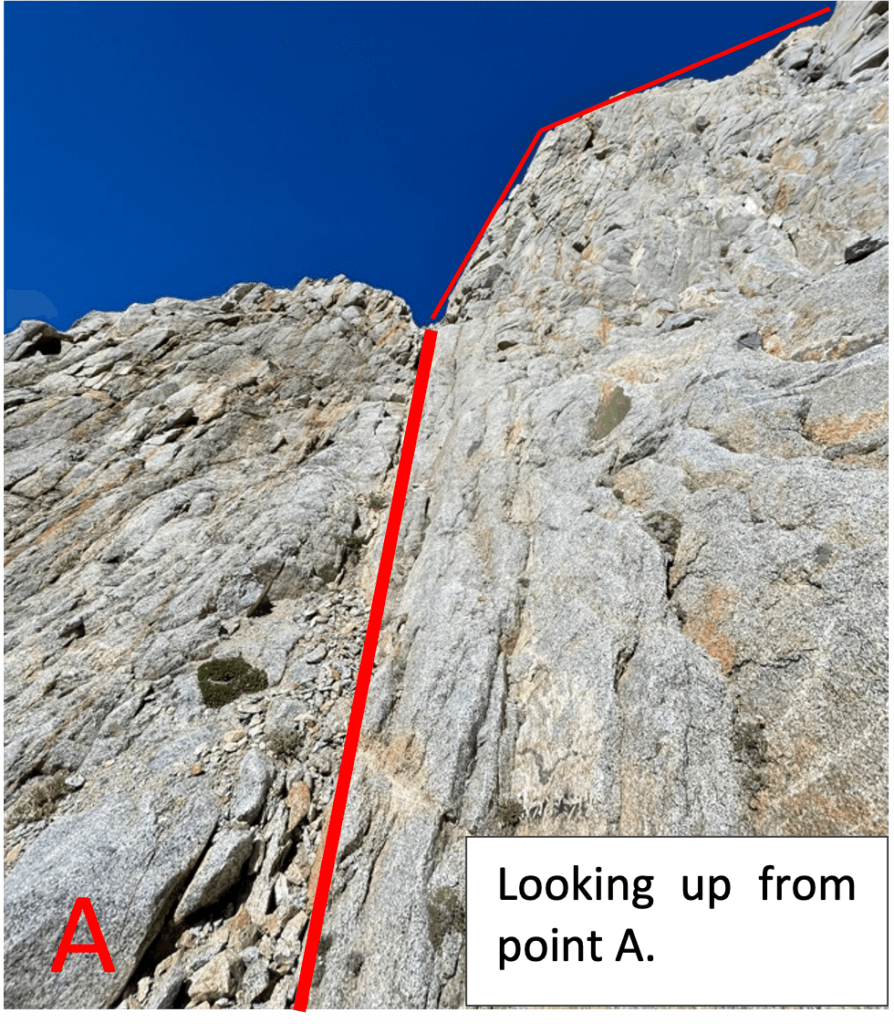
Looking up the mountain from the top of the rib you will be able to see an obvious notch in the skyline. Scramble to this notch and go climbers left to gain the ridge.
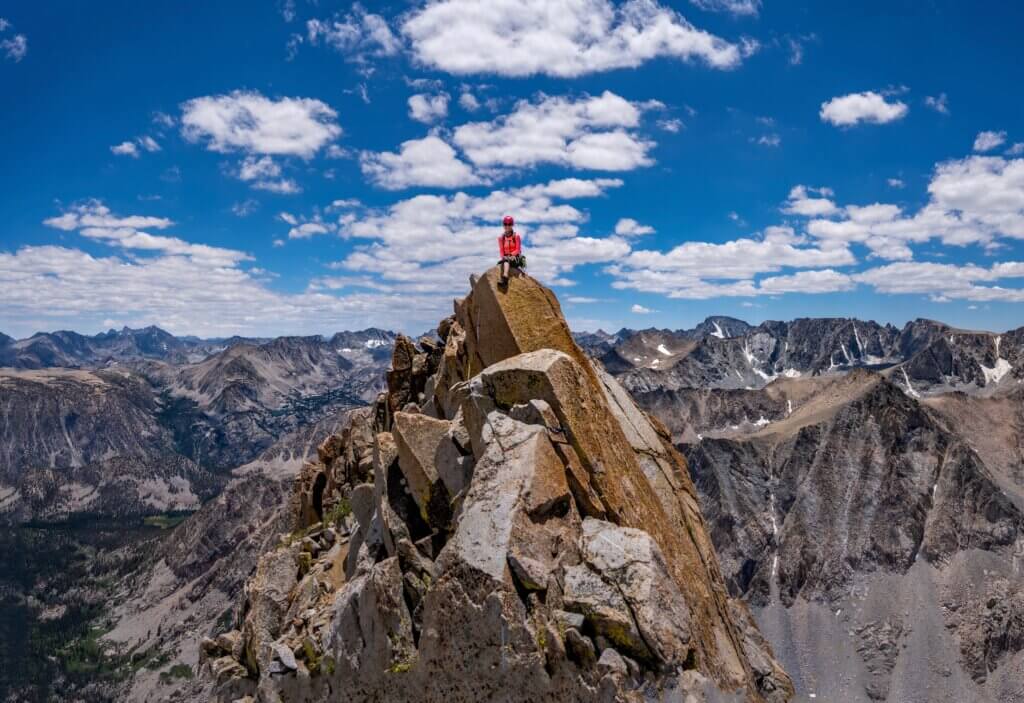
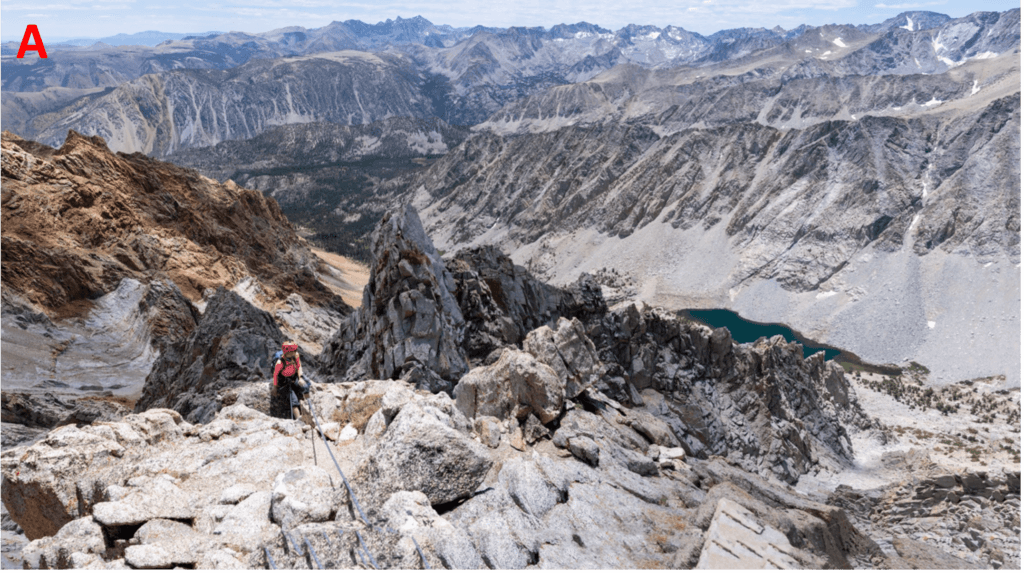
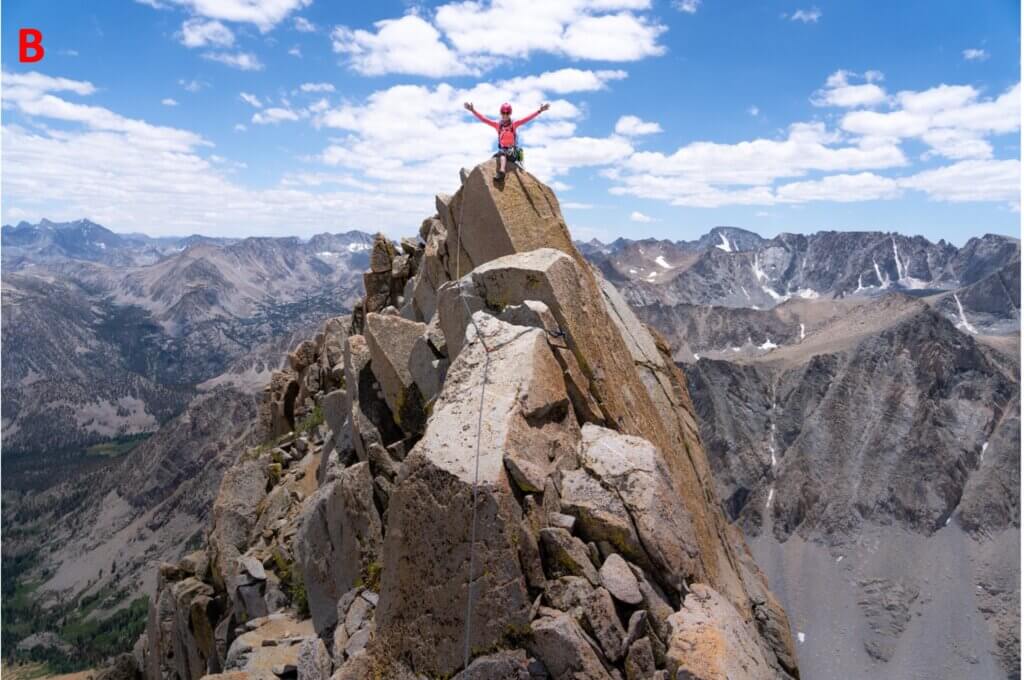
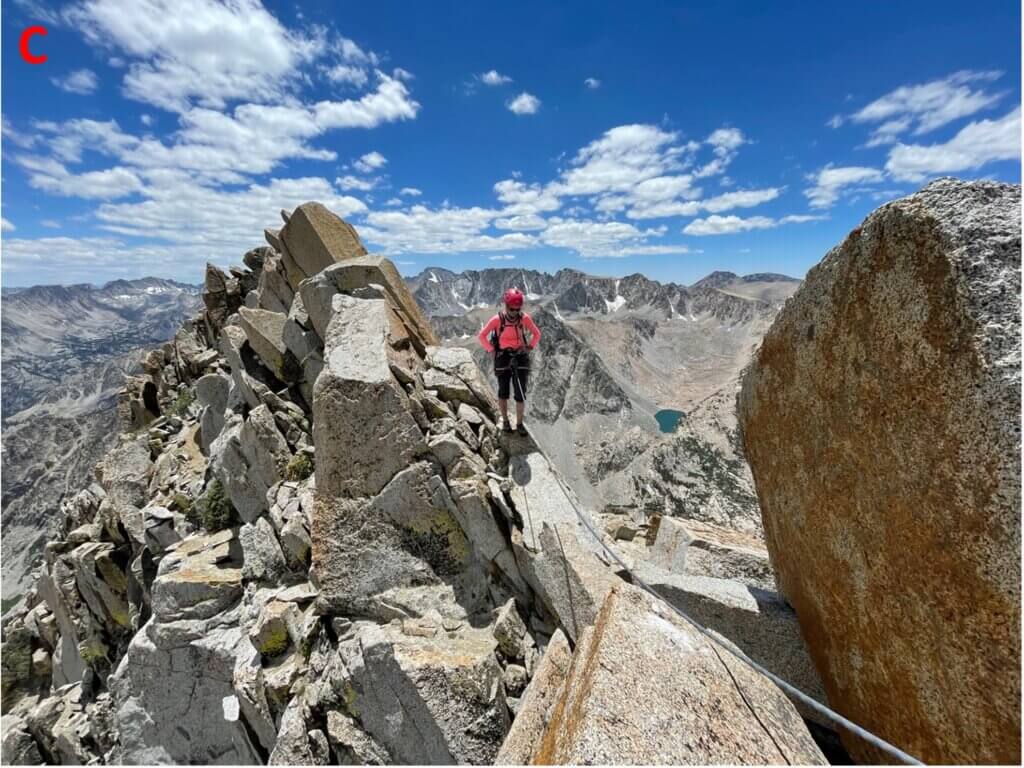
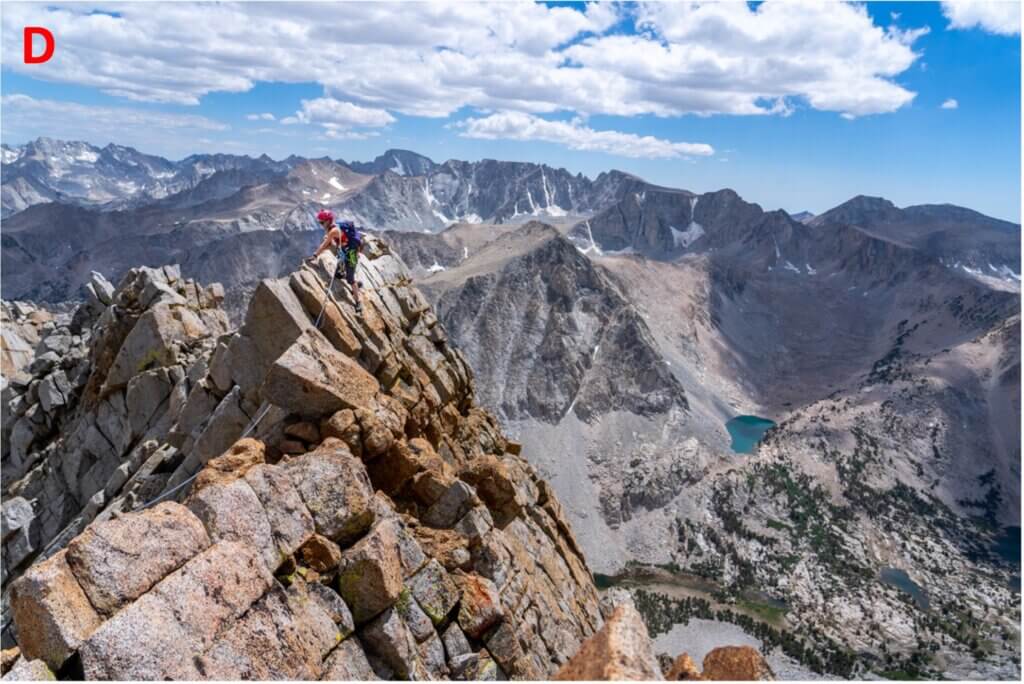
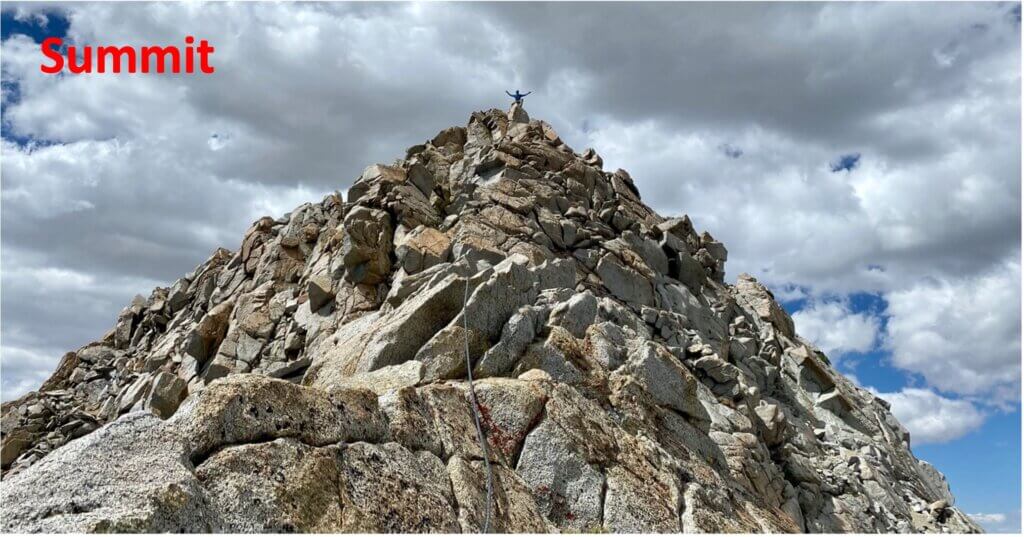
Mt. Emerson Main Ridge Line
Once at the U-notch you’ll see the beginning of the main ridge line. The route gets very exposed here, but the climbing is easy. From this point forward the route to the summit is obvious. I’ve labeled a few of my favorite points along the ridge.
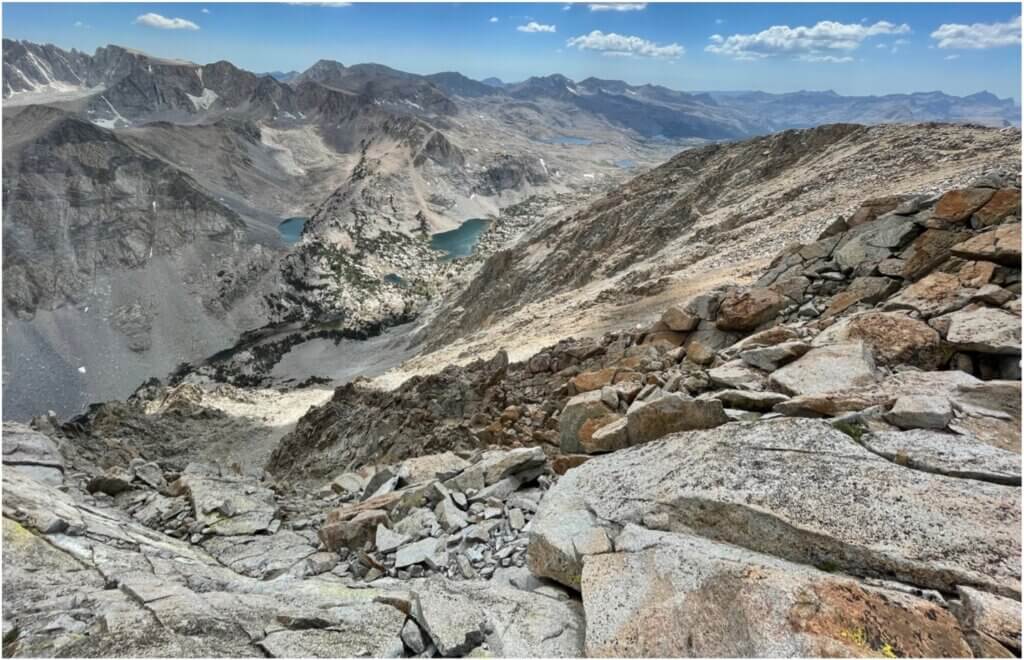
Mt. Emerson Descent
For the descent, pass the summit blocks and take the first gully to the left. There’s some third class throughout the descent and it often looks as if you may cliff out, but there’s always a smooth route. The descent goes on for a longgg time and can be rough one the knees. We found it was best to stay as far to the skiers left as possible. Eventually it will spit you out at the tree line where you can cut through and find the Piute Pass Trail. It’s roughly 3.5 miles from where you gain the trail back to the parking lot.
Happy Climbing!